CHAPTER 1 - BASIC SHAPE OF THE HEAD
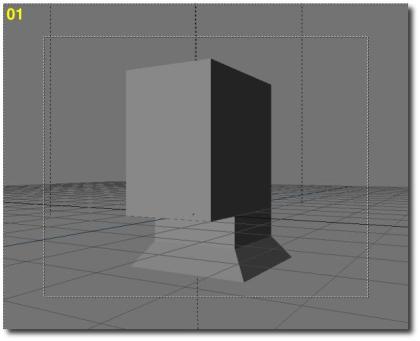
Step 01
At first, extrude (E-KEY) the base plane
a few times, using G-KEY and S-KEY in order to get the proper starting shape.
You can also download the according blend file here. Anyway, modelling these
basic shapes should not prove too difficult for you, unless you are a new
blender user. In this case, you should read some basic tutorials about Blender
Creator first.
You should also set the camera
view in order to have a fair prespective view from the head-to-come, and
set a few lights. I choosed to place a cold blue lamp in the background,
and a warm red lamp in the foreground, to get more colour contrast during
the intermediate rendering of the head. During all the following steps, using
the Z-KEY in order to toggle between the edged view and the shaded view will
help a lot. Keep this tip in mind!
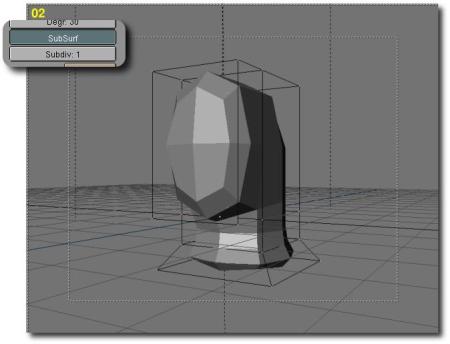
Step 02
We are now about to use the SubSurf tool.
Shift to the F9 Edit buttons, with the head selected, and set the SubDiv option
to 1 and then press the SubSurf button. That's it! You now have a more accurate
basic shape for you to work with!
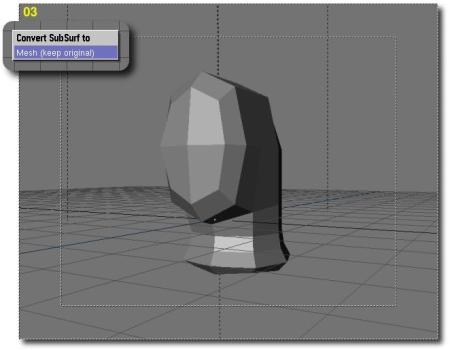
Step 03
Now, we will turn the SubSurf into a
real mesh using the ALT+C combo. Choose 'Mesh (keep original)' to the popup
requester 'Convert SubSurf to'. Then press the X-KEY in order to delete the
original mesh. You now have only the basic shape on the screen.
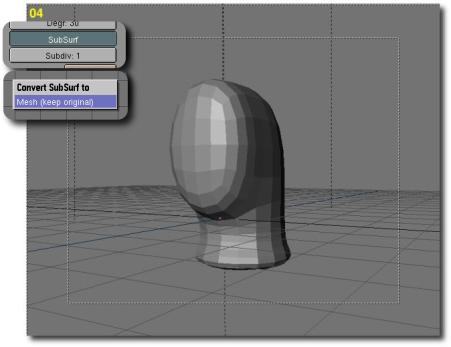
Step 04
Press again the SubSurf button, and turn
the SubSurf into a real mesh once again, and clear the original mesh exactly
the same way as in Step 03.
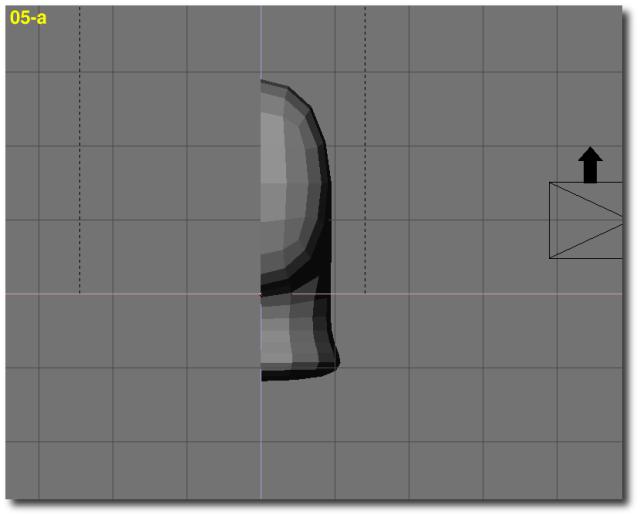
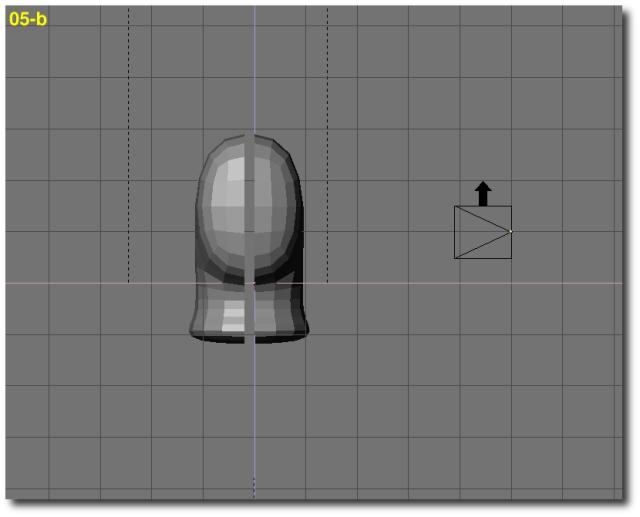
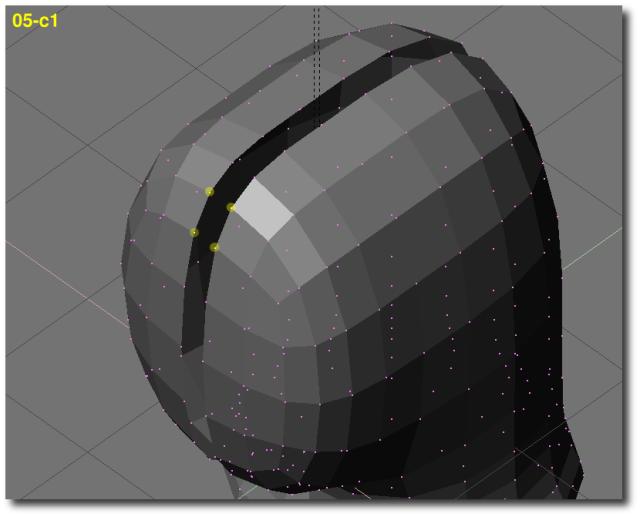
Step 05
In edit mode (TAB), delete half of the
face (a). Select all the vertice (A-KEY), copy them (SHIFT+D) and mirror them
(S-KEY, X-KEY). Then move the copied half-face (b). Now select all the vertice
except those to join and press the Hide button. Select the vertice four by
four with the B-KEY, and make face (F-KEY). Tip: to make things easier, you
can turn on the Draw Faces button and rotate the 3D view while you make faces.
Be sure to close all faces! (c1 and c2)

CHAPTER TWO - WORKING OUT BASIC EYES AND
MOUTH
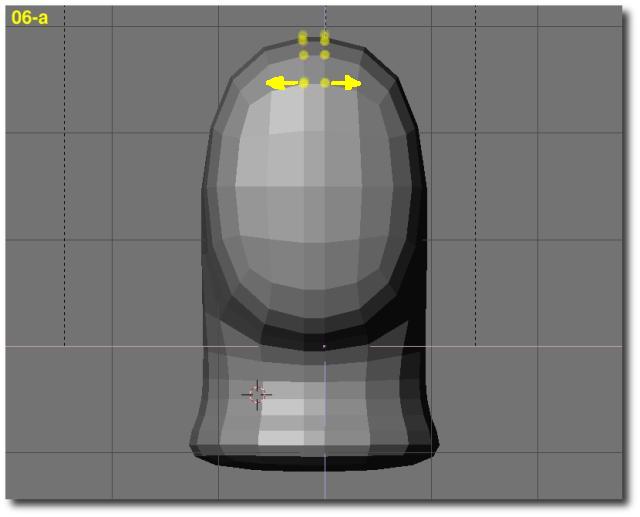
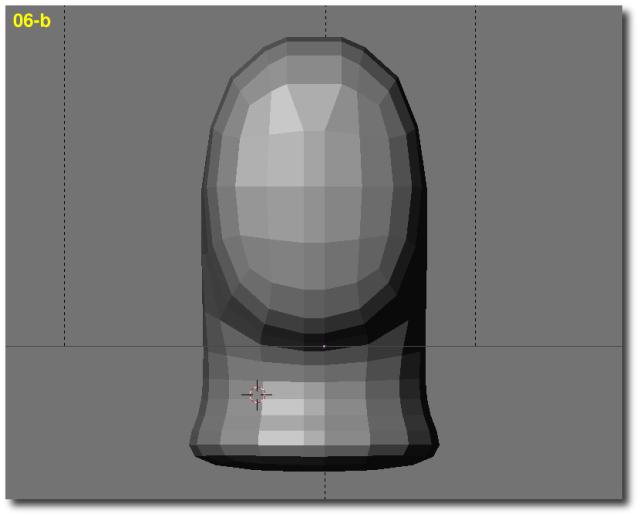
Step 06
Rearange slightly the vertice making
up the forehead.
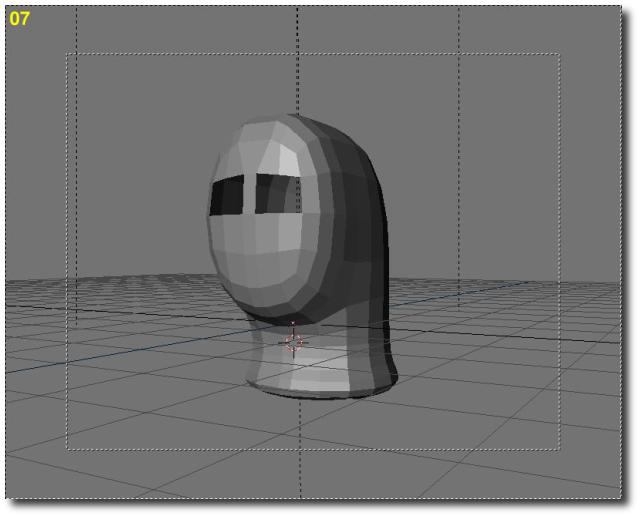
Step 07
Delete the central edge from the eye
area (X-KEY, select edges). You now have the eye sockets wide open.
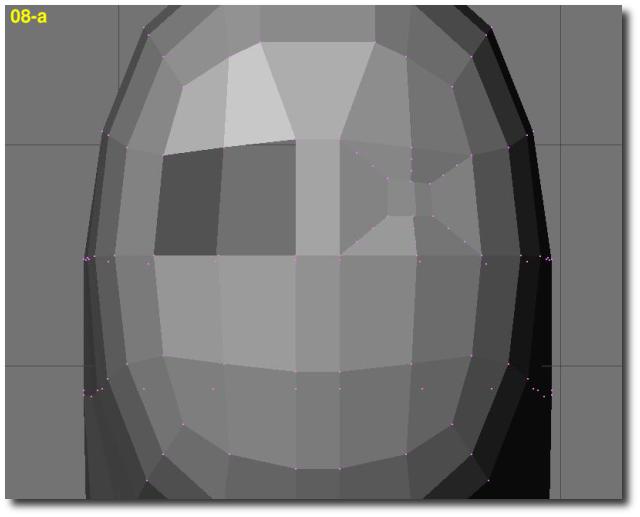
Step 08
We will use extrusion (E-KEY) and resizing (S-KEY)
to create eyelids. Go through it three times (a). Then select the faces from
the eye socket, press Select Swap and then Hide. In front view and side view,
rearange vertex by vertex the shape of the eyelid, using the G-KEY. Especially,
move the second circle of vertice slightly deeper in the head (b).
Step 09
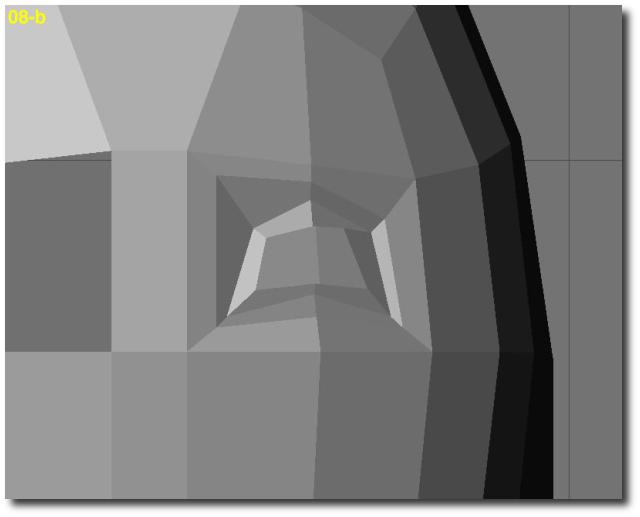
And now for the tricky part. To go through it,
you should now how to place the cursor over a particular vertex, and how
to set a new origin for any object. Here we go.
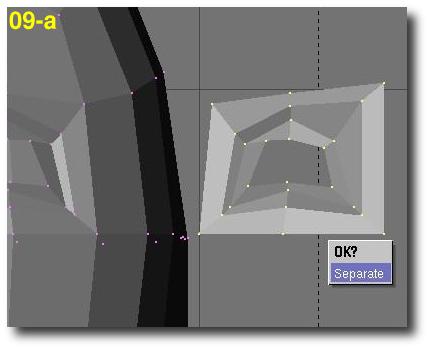
Select the eye socket newly created. Copy it
(SHIFT+D) and mirror it (S-KEY, X-KEY) and press RETURN. Now, move it somewhere
outside of the head and separate it (P-KEY) from the other vertice. Select
the socket and enter edit mode (TAB). Select one of the outer vertex and
set the new center of the object on it (Center button). Now exit the edit
mode (TAB), select the head and enter the edit mode (TAB). Choose the inner
vertex corresponding to the one to which you set the center at, on the eye
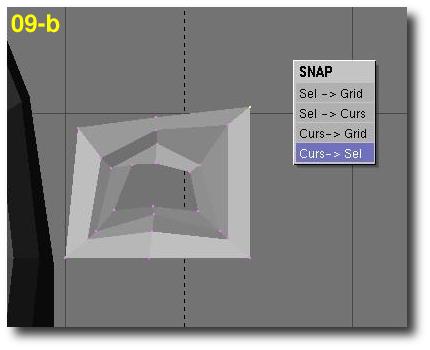
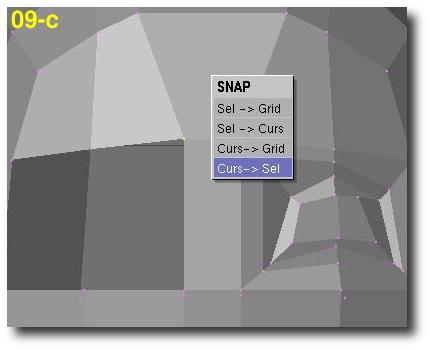
socket. Use SHIFT+S (SNAP Curs->Sel) to set the cursor on it. Exit edit
mode and select the eye socket. Use SHIFT+S again (SNAP Sel->Curs). The
socket is now perfectly in place! Select the eye socket and then the head.
Press J-KEY to join the meshes. In edit mode (TAB), select all the vertice
(A-KEY) and press the Rem Doubles button.

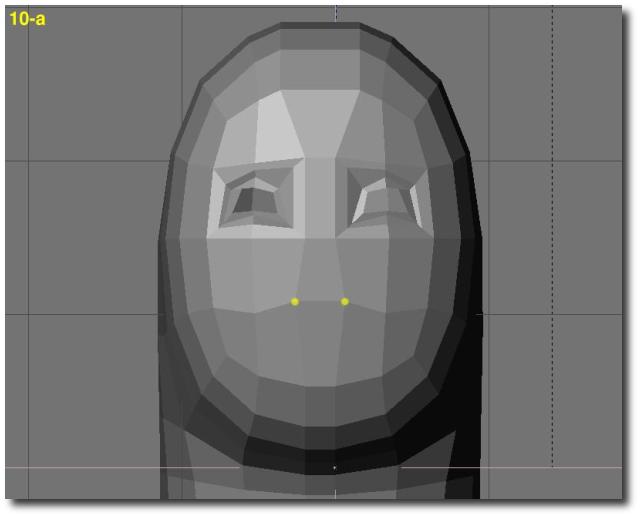
Step 10
We are about to model the mouth exactly the
same way we did with the eyes. First of all, rearange slightly the vertice
on the upper part of the mouth-to-be (a). The select the two vertice shared
by one of the vertical inner edges of the mouth and delete them (X-KEY, select
edges). Do the same with the other two vertice of the last vertical inner
edge of the mouth. You now have a wide open mouth gap (b).
Step 11
As in step 08, we will use extrusion (E-KEY)
and resizing (S-KEY) to creat the lips. Go through it four times (a). Now
select the vertex newly extruded, press Select Swap and then Hide. First of
all, move the third and fourth circle of vertice slightly deeper in the head,
and resize the fifth and last circle in order for it to be only slightly
smaller than the fourth row (b). Then, in front view and side view, rearange
vertex by vertex the shape of the lips, using the G-KEY (c).

CHAPTER THREE - SHAPING THE HEAD AND FACE
MORE ACCURATELY
Step 12
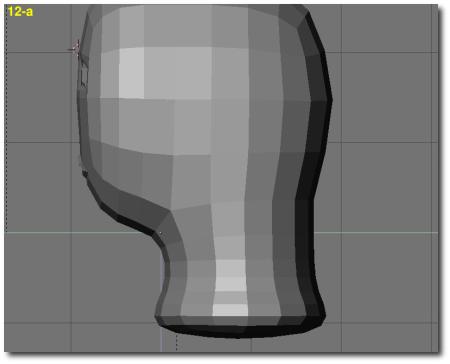
We will now pay some interest to the neck. First
of all, in the back view, select the four middle columns of vertice constituting
the neck and in side view, move the vertice in order to get something more
realistic (a). You should turn on the magnet tool (O-KEY, smooth) and set
the effect radius to more or less two grid units. Then, in the side view,
select the two middle vertice columns and size them down in the front view
(b).
Step 13
Here we go for what is, IMHO, the hardest part
of face modeling, but also the most fun, thanks to the SubSurf tools featured
in Blender. It's just about your own modeling talent, right now! Do multiple
saves of your work, and don't forget that you can undo all the changes you
made to your model since the last time you exited and then reentered the
edit mode (TAB-TAB) with the U-KEY. Some tips:
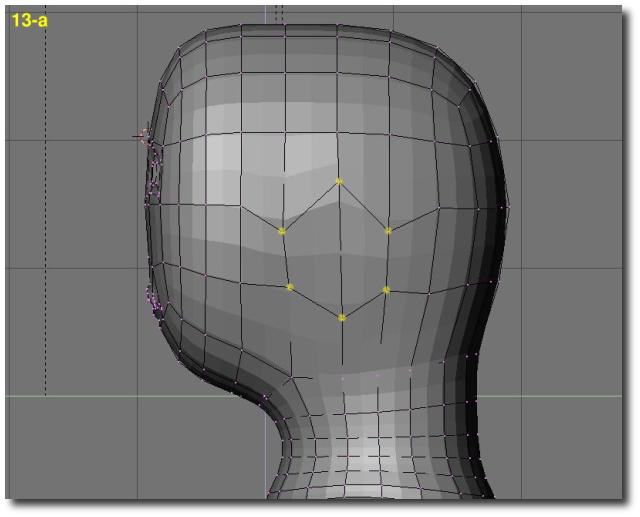
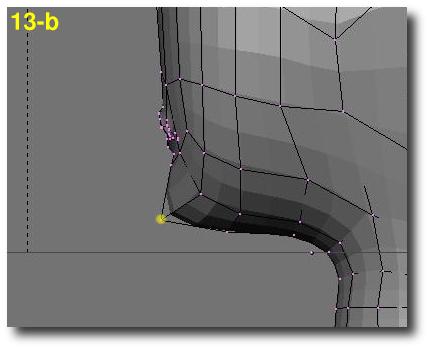
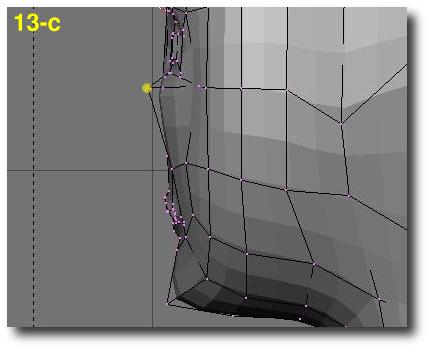
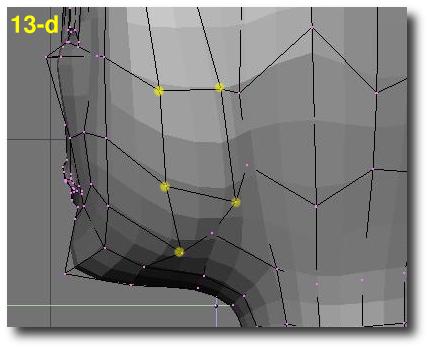
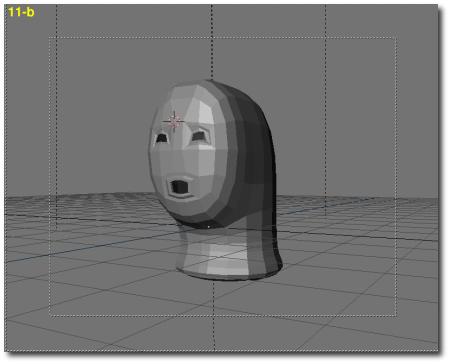
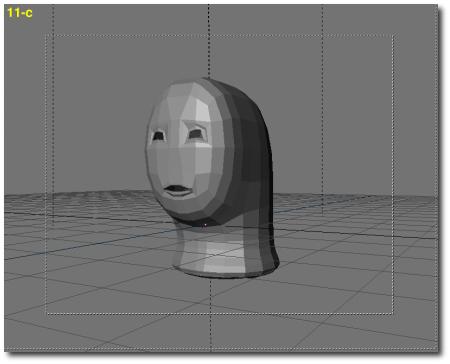
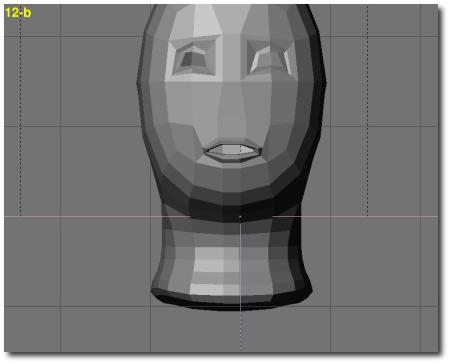
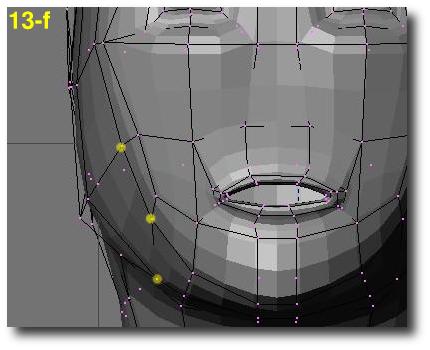
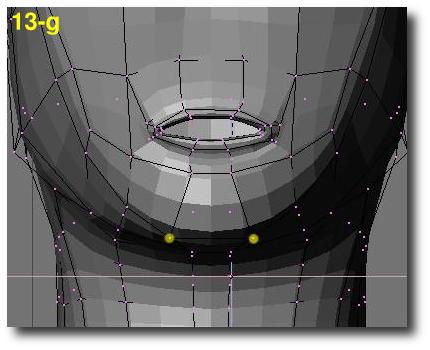
In face view, work a little more on the cheecks (e), the jaws (f) and the (menton) (g).

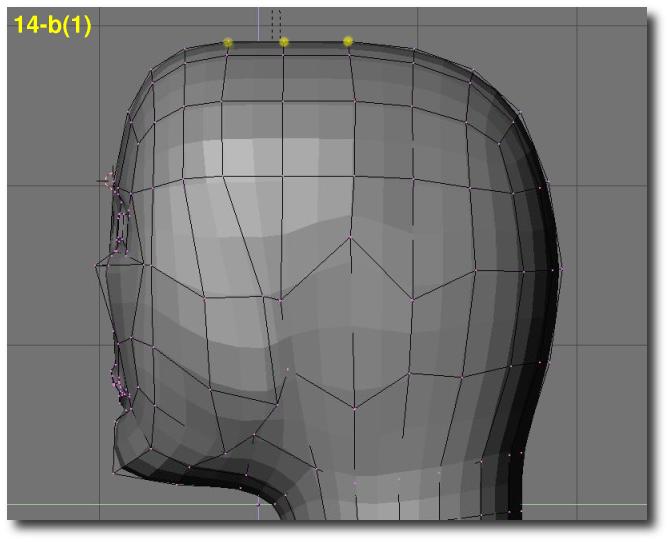
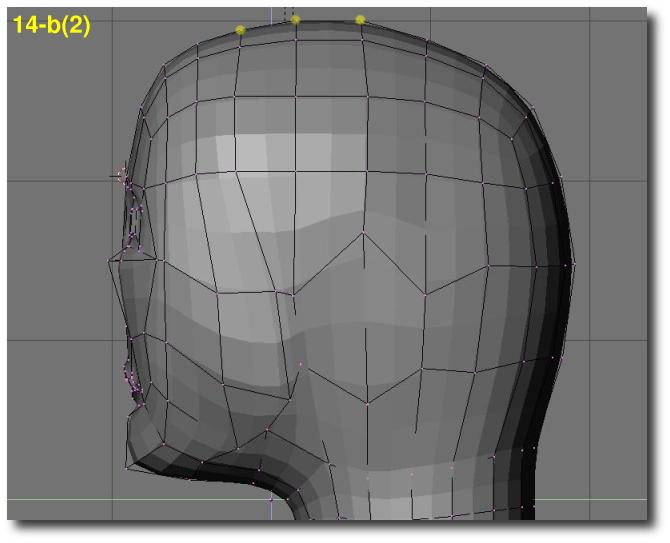
Step 14
Let's work now on the shape of the head. In
front view, give it a more natural shape (a). Give it more roundness in side
view (b) and in top view. Adjust the neck and the back of the head in side
view (c).
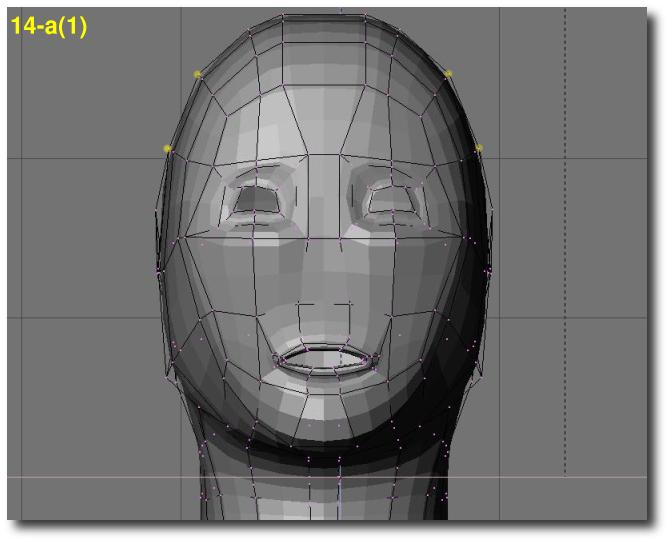
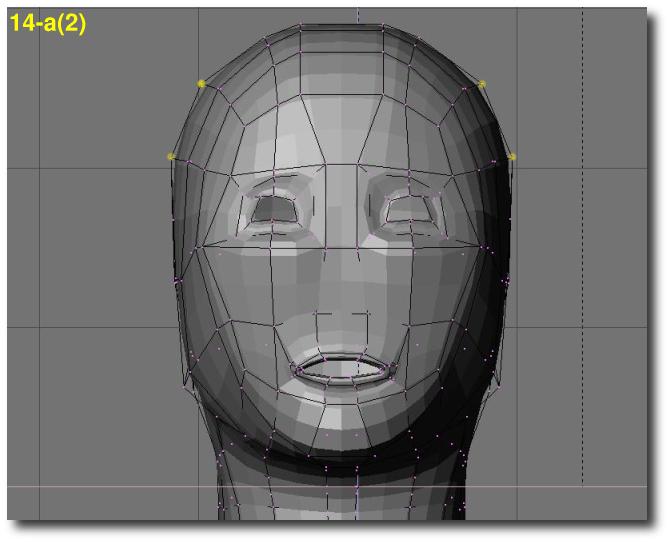
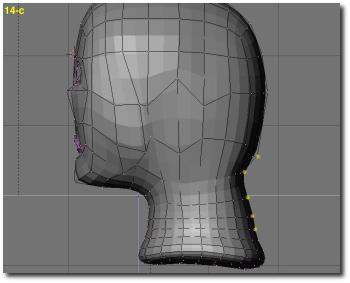
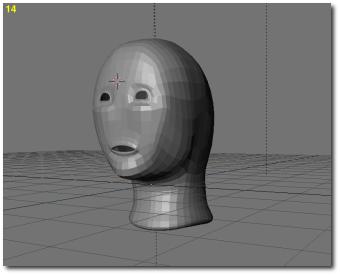
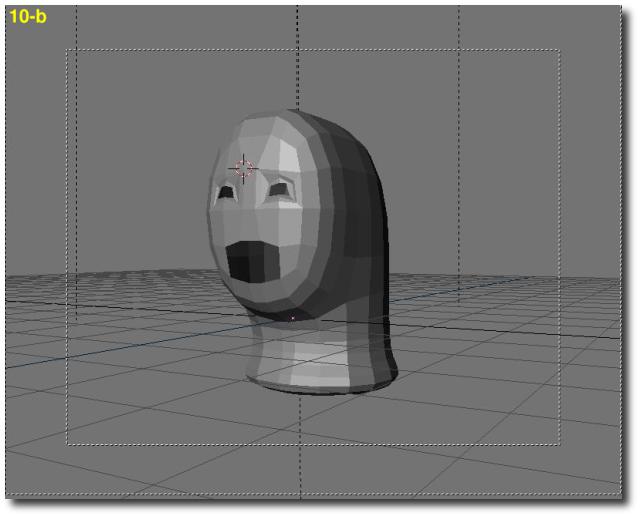
For the moment, we have a rather cool E.T. face, haven't we? It lacks yet some features so let's move to the next step.
CHAPTER FOUR - MODELLING THE NOSE
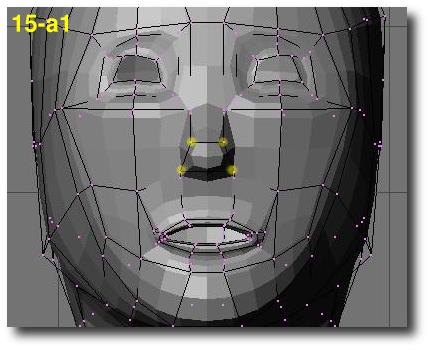
Step 15
In order to model the nose, select the four
middle vertice and extrude (E-KEY) them forward. Rearange them slightly but
don't get into fine details yet (a). Then select all the vertice from the
nose area, and then subdivide them once (W-KEY). Select the middle column,
and grab it forward (b). The red dotted vertex should be pulled forward slightly
more than others. Your nose is quite good looking right now!

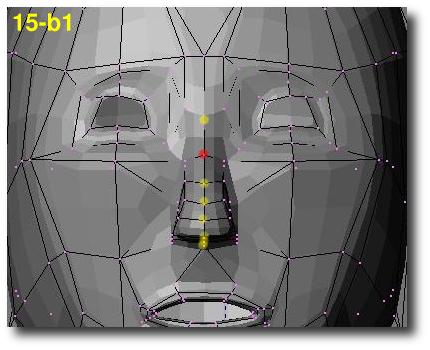
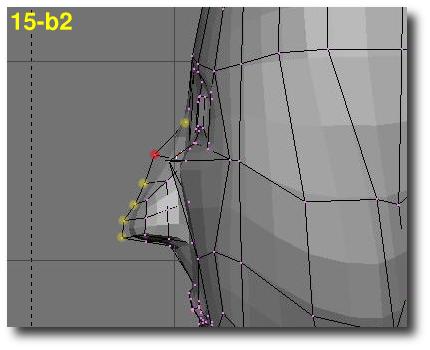
Let's re-work the connection of the nose with the front (c) in the side view and the eyebrows area (d) in the top view.
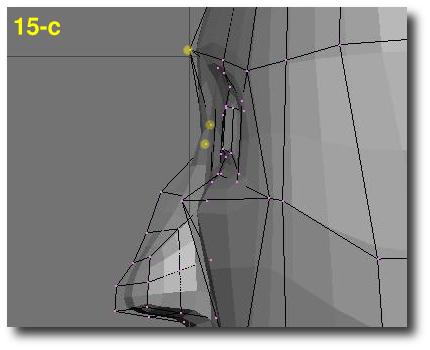
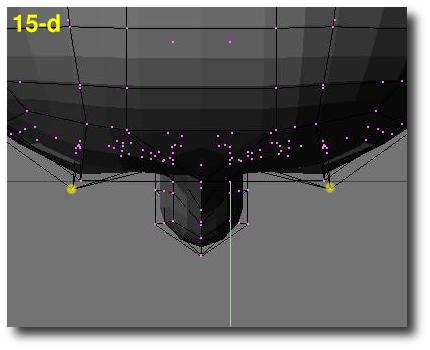
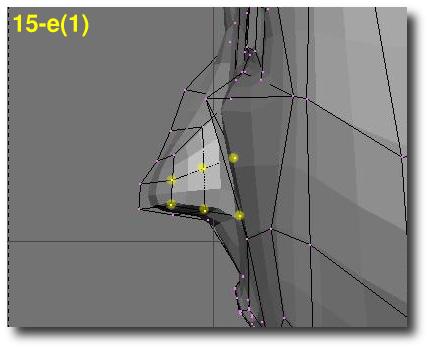
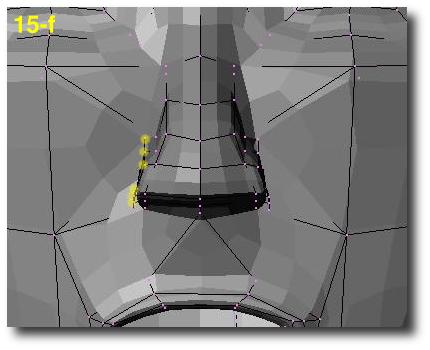
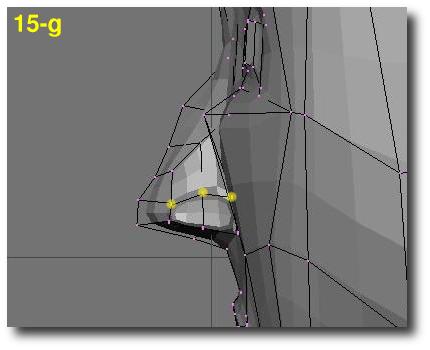
Not we should pay attention to the nostrils. Select the six vertice making the nostril on one nose-side, and extrude them (e). Repeat the same operation on the other side of the nose (f) and then reshape the nostrils in side view (g).

CHAPTER FIVE - WORKING OUT THE DETAILS
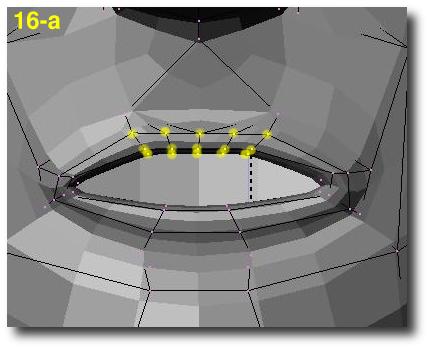
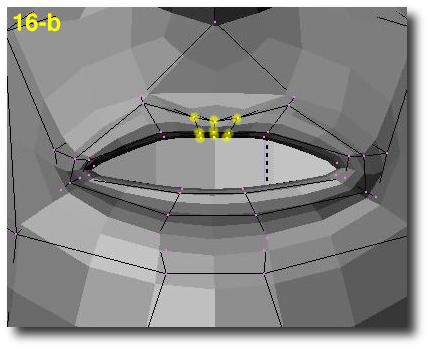
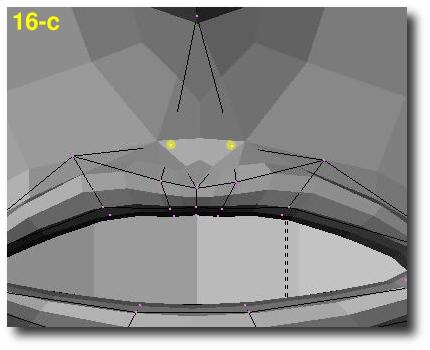
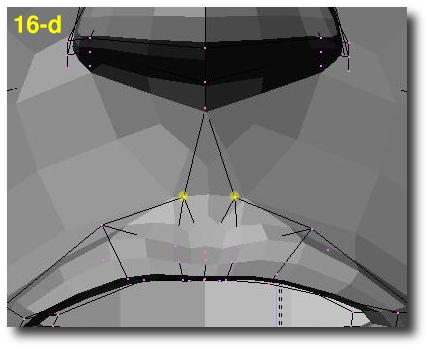
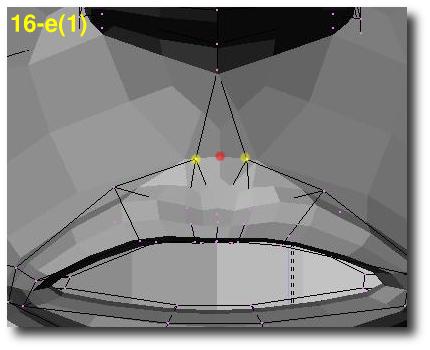
Step 16
We will work now on the lips, because they look
real poor for the moment. First of all, select the four middle vertice of
the upper lip. Subdive-beauty them twice (a). Re-arrange the vertice (b),
(c) and (d). Select the two middle vertice of the mouth dimple and sudivide
once (e1). Pull the new vertex (showed in red) slightly inside the head (e2).